I get these creative impulses sometimes where the thought of trying one specific thing becomes a bit of an obsession. I had this feeling a few weeks ago – I wanted to load 35mm film in to an old Brownie I had around the house, which usually loads 620 film – a format that isn’t made anymore. The appeal was exposing the entire width of the 35mm film as well as attempting a few double-exposures, since you manually wind the film after each opening of the shutter.
I did some YouTube research, finding that loading should be pretty easy, it’s more the getting out and developing that’s hard. I now wish I had taken pictures of my process of loading my film to help illustrate what I’m about to write. I found this Lomography post really helpful, as well as this YouTube video on how my Brownie model would normally be loaded.
To start, the Brownie has this window in the back that would normally show the exposure number on the back of the film. I covered that with black electrical tape so no light could get through, on both the inside and outside of the camera. I then attached some paper to the leader of my black and white film and then to the spool inside the camera so that it would reach around the back of the camera without wasting too much film. I had to wedge the 35mm canister in to the normal holder, which made me nervous but it actually fit quite well. After getting things to wind a short distance, I closed up the camera and that was it: no going back.
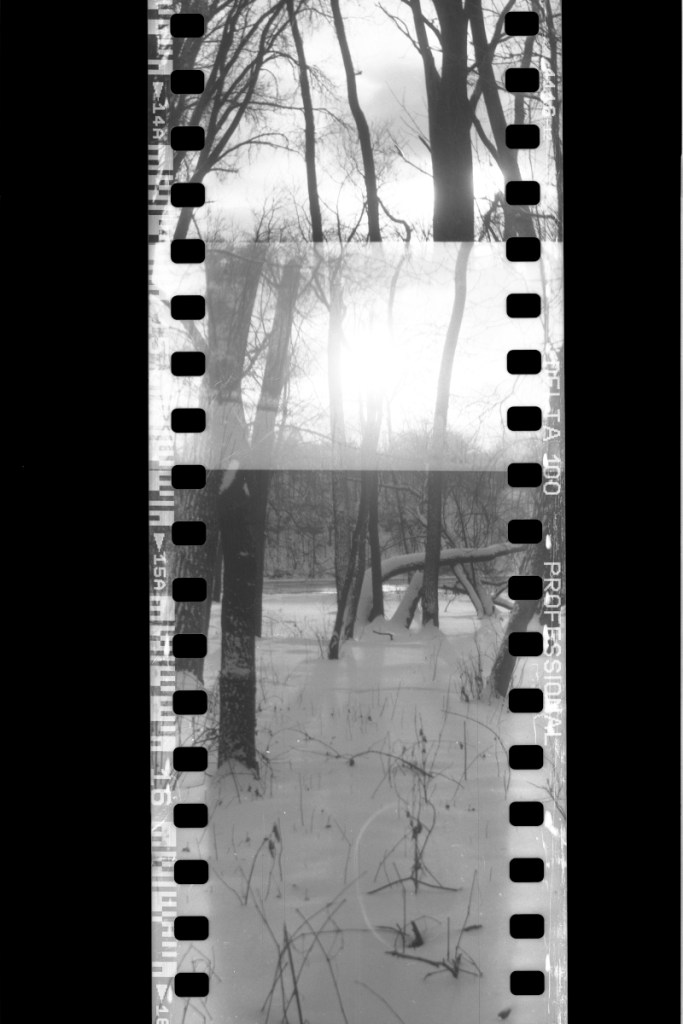
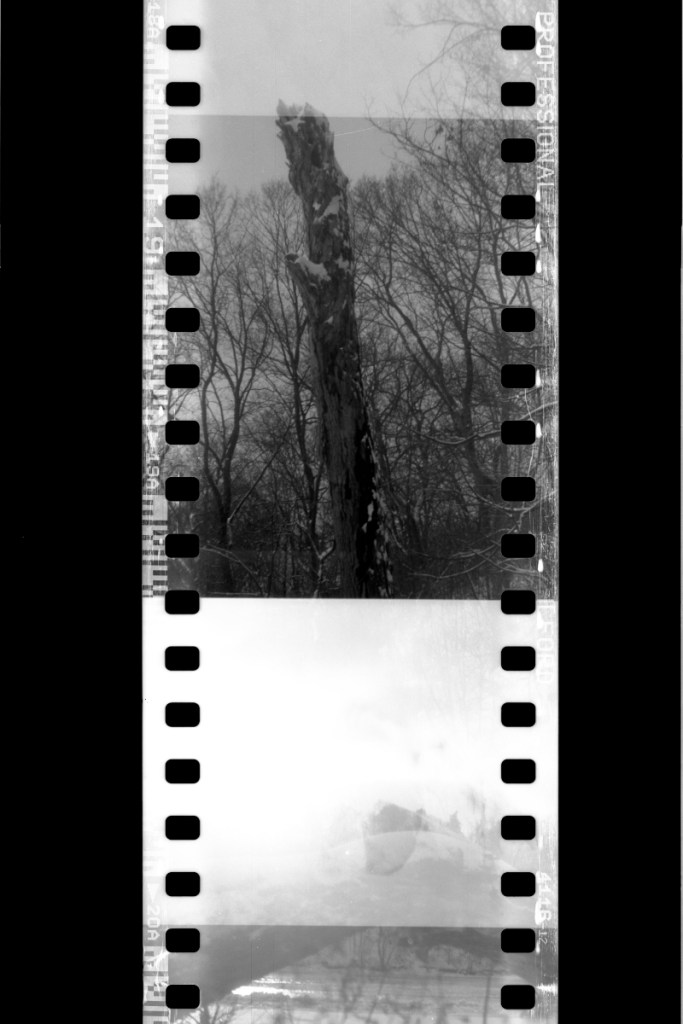
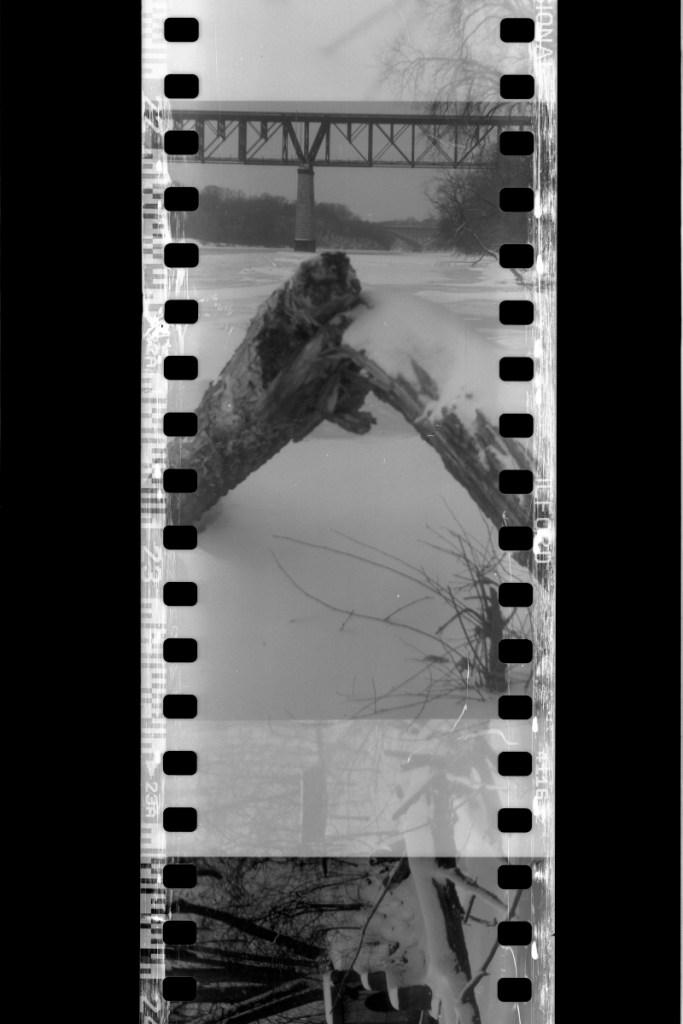
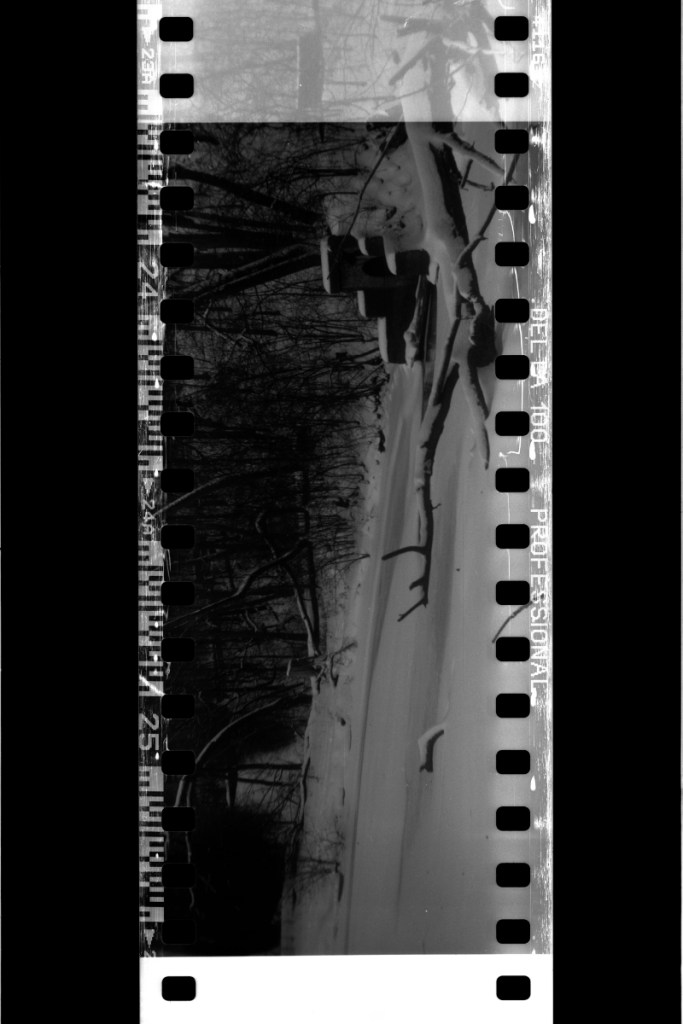
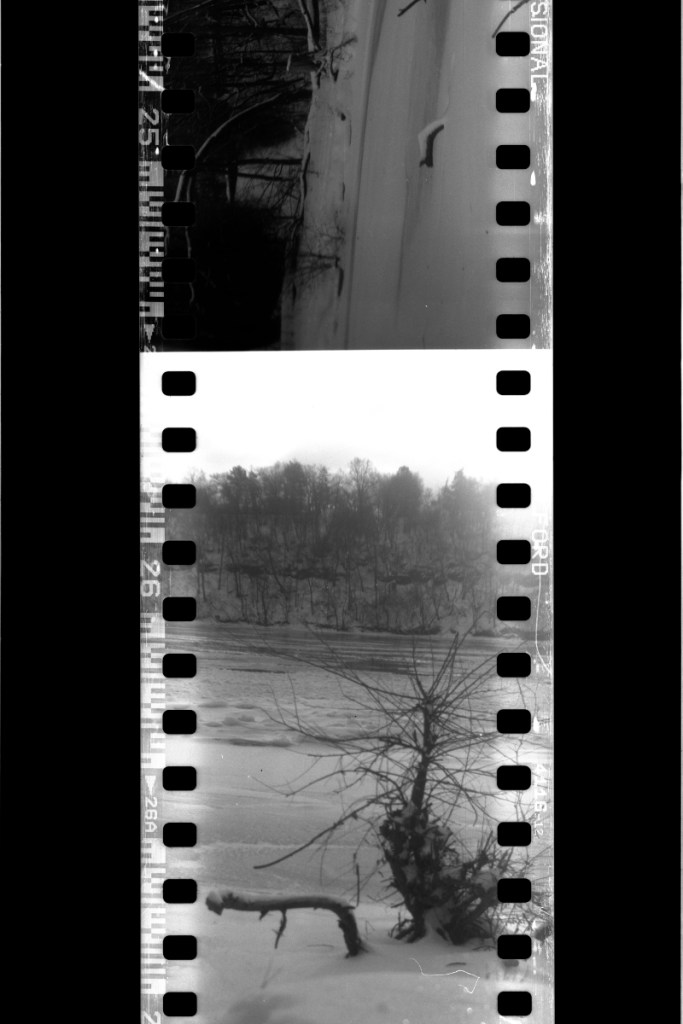
I had to be very selective about the film I chose to load – the camera has only one aperture setting and one shutter speed. I selected Ilford Professional 100 film, knowing that it was a bright, sunny day and there’s a lot of snow. I also knew I would be attempting a few double-exposures, so by choosing a film that would likely be more under-exposed than over, I would be more likely to accomplish balanced double-exposures.
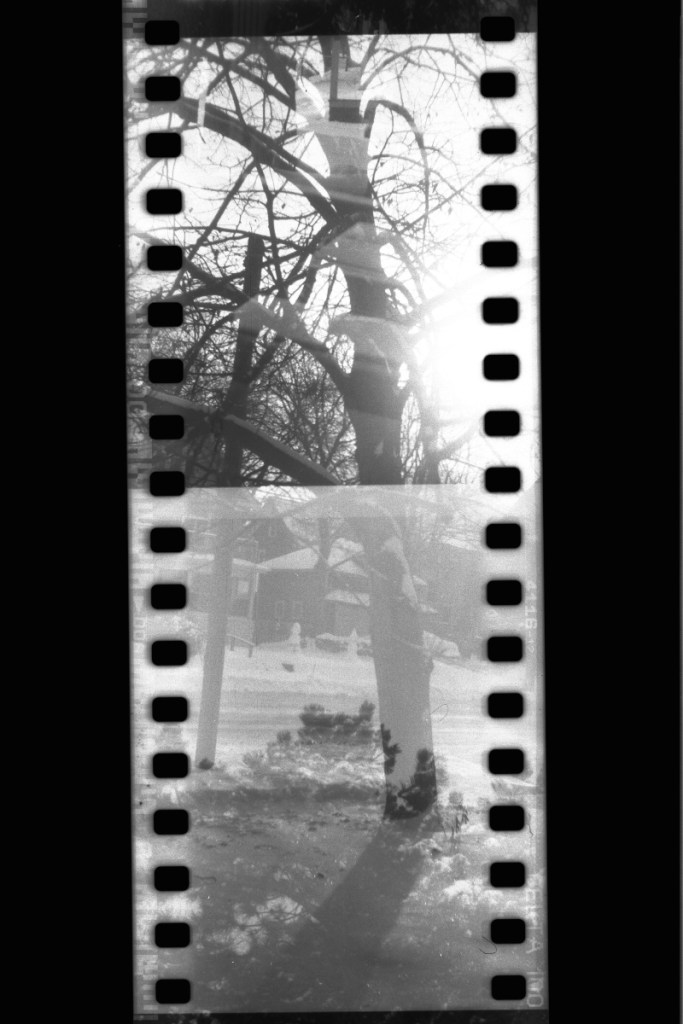
I spent an hour walking around in the cold in one of my favorite places near the river for my experimental shoot. I didn’t want to commit to any kind of high expectations since there was no way to know if the film would actually get exposed properly at all. I tried different amounts of winding between each picture, attempted to get a variety of lighting conditions, and also altered my subject matter throughout. I actually found this process quite freeing once I got used to it – I was thinking entirely of what I was seeing and how I wanted to capture it, without looking through any kind of lens. What little control I usually have over film outcomes was completely released in this process.
Once home, I unloaded the camera directly in to my developing spool (worth noting my changing bag is WAY too small for this) and went straight to developing. I was half-expecting nothing to be on the roll, that there would have been some kind of light leak in this old camera and that everything would be for nothing. I actually squealed when I saw that images were there once I hung the film to dry. It worked!
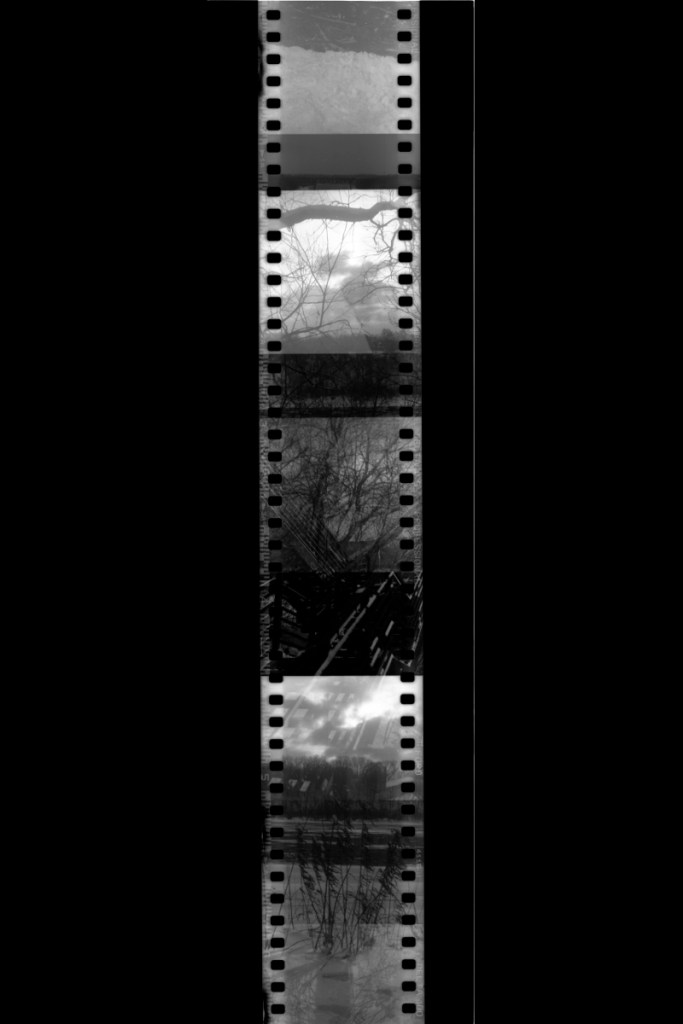
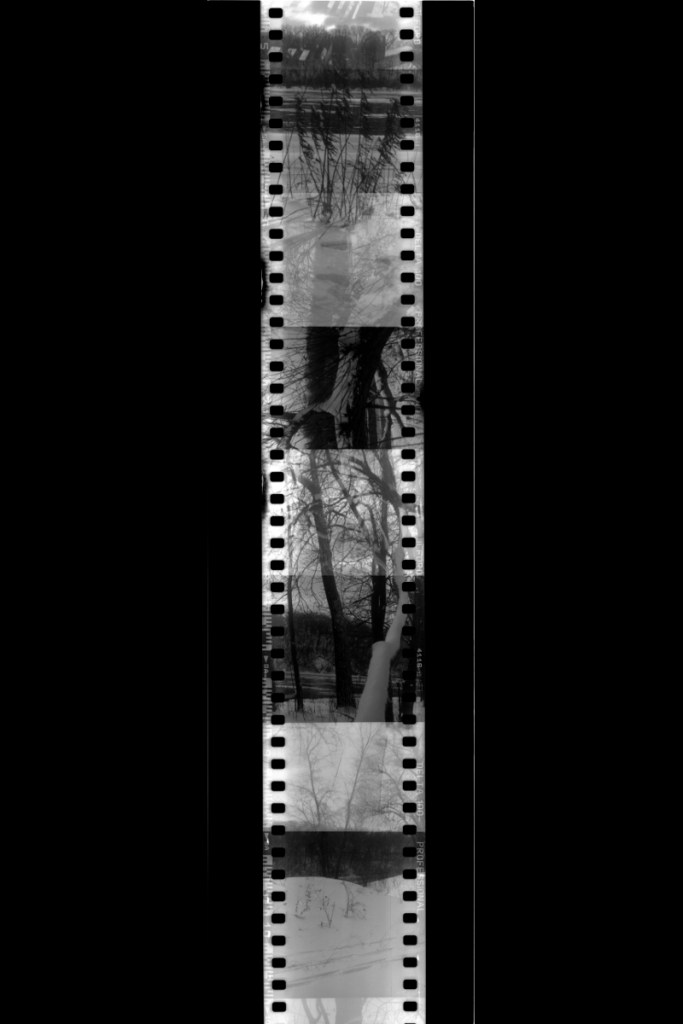
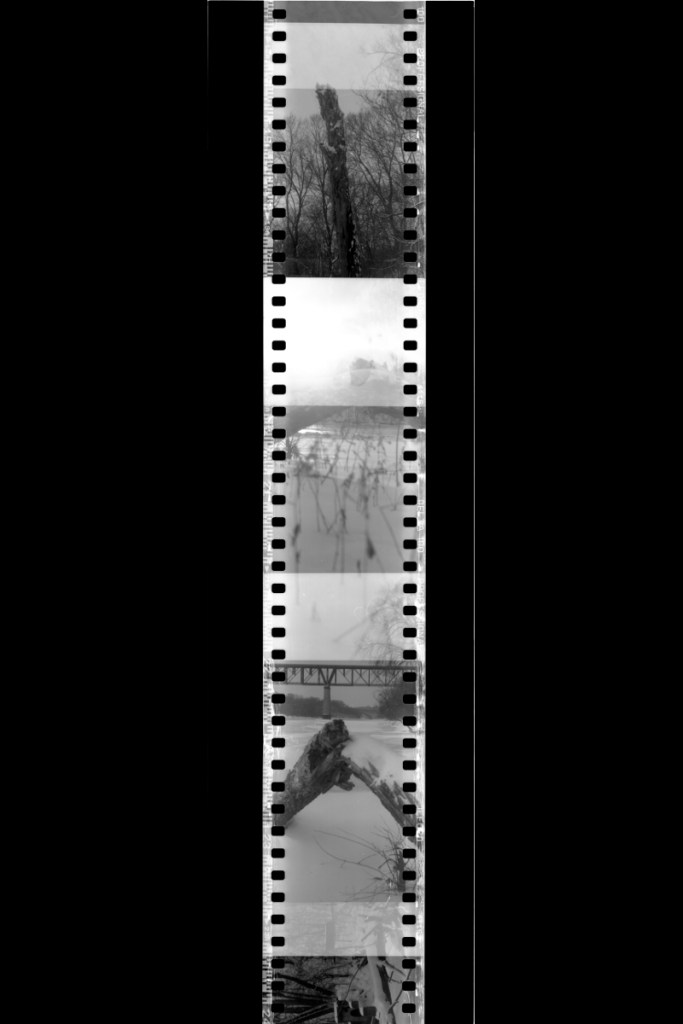
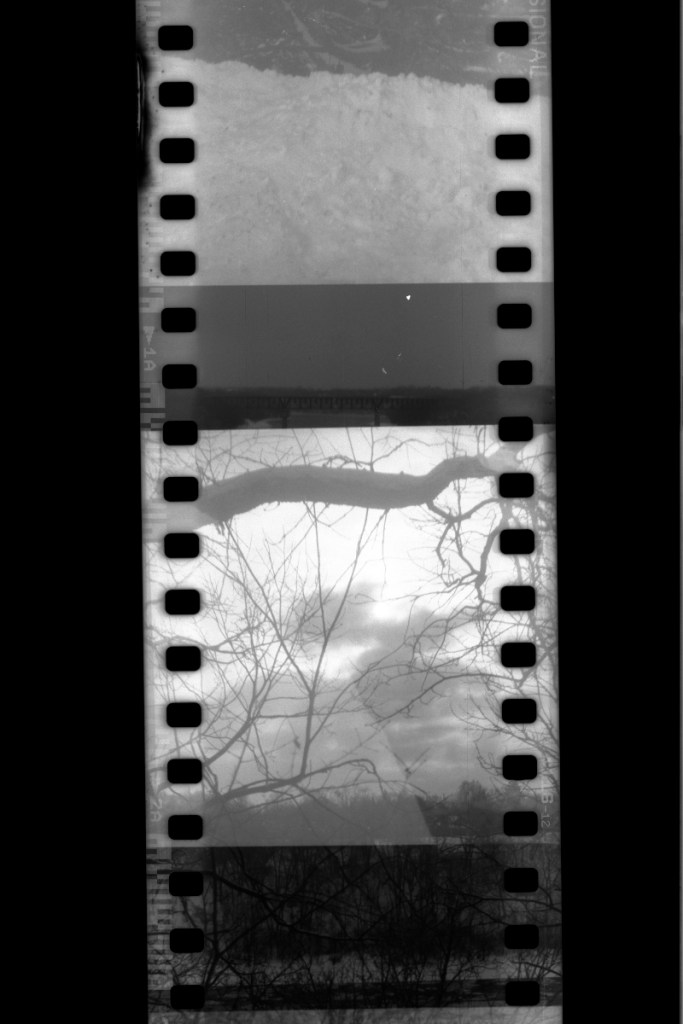
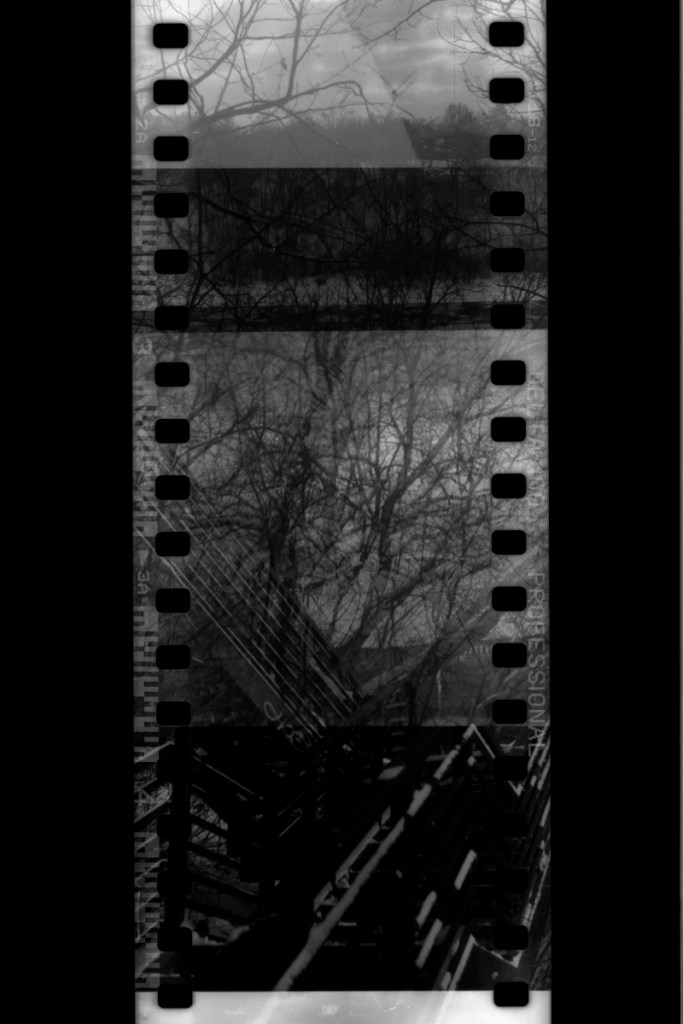
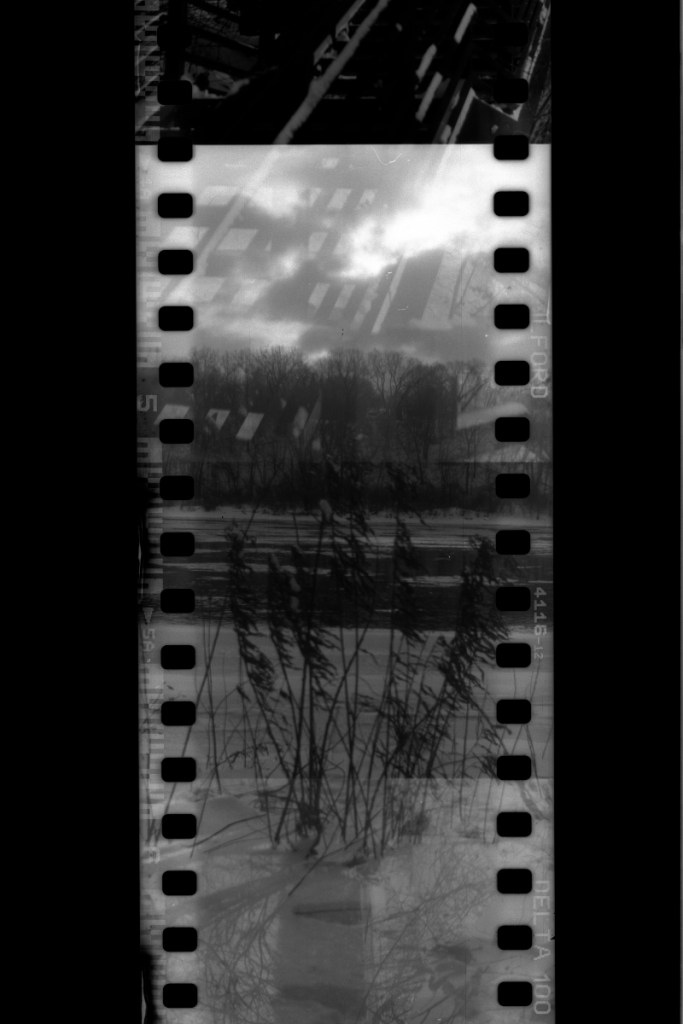
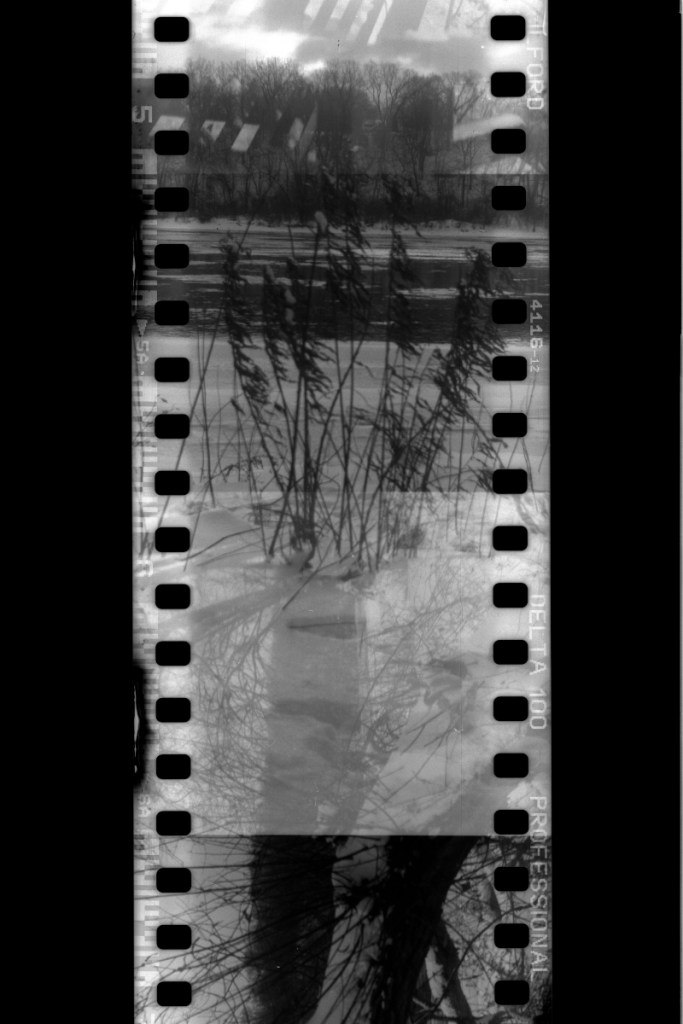
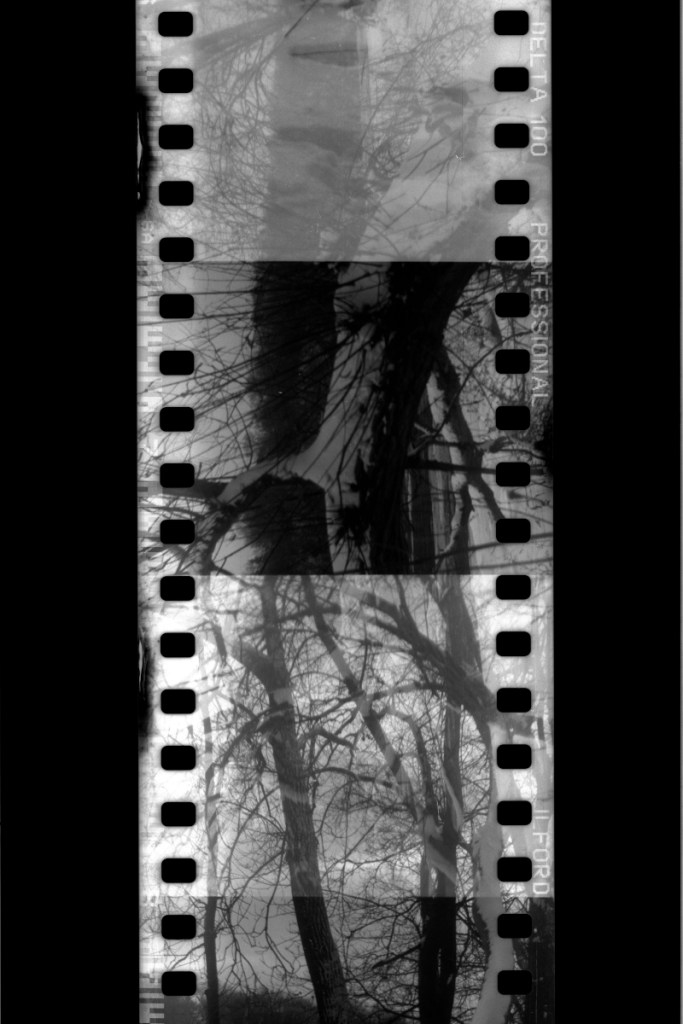
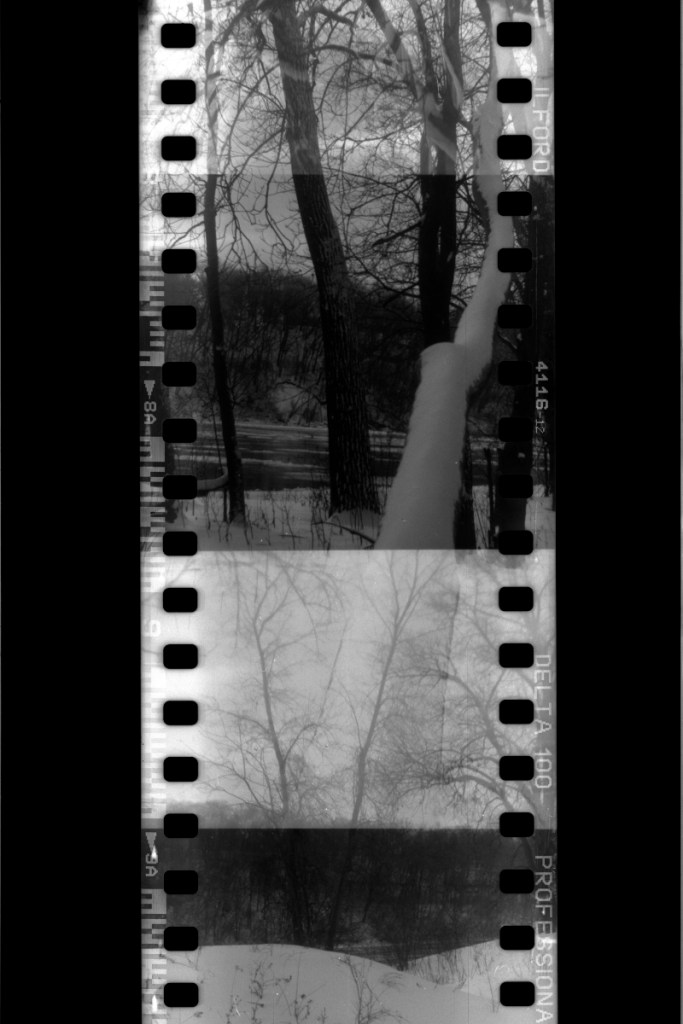
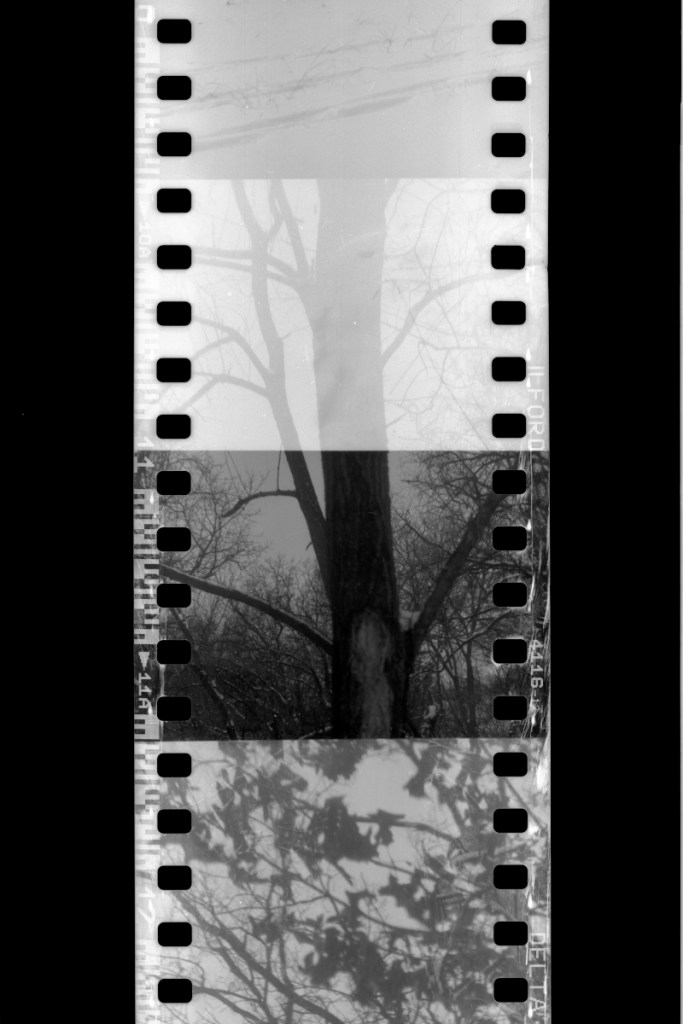
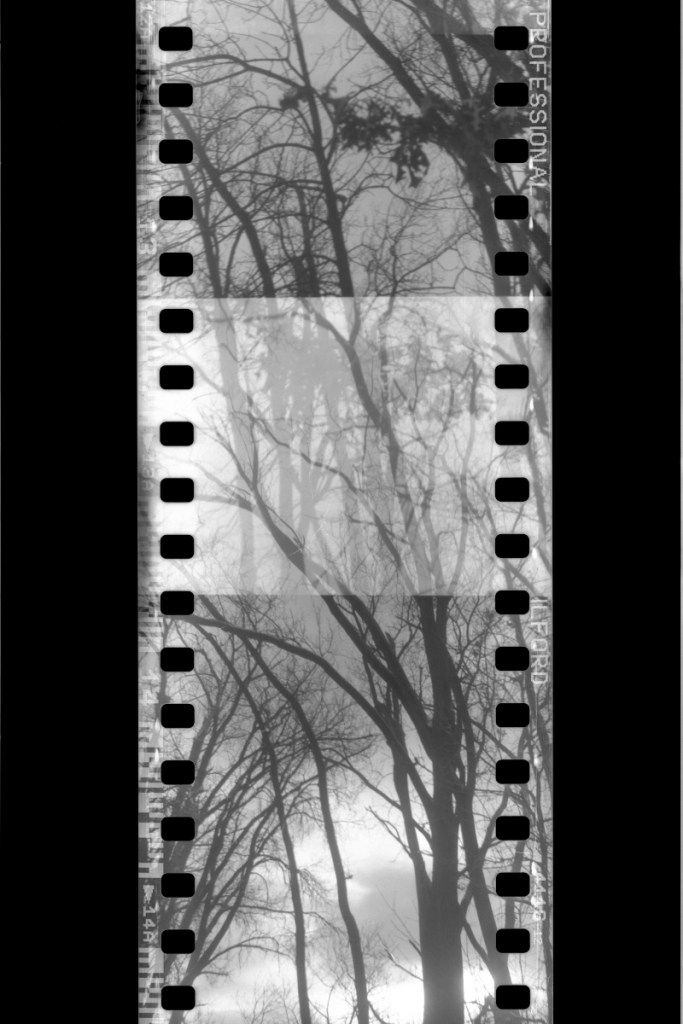
There are a few things I would do differently if I could. The sprocket area on the film ended up pretty damaged – I believe this is both because of the difficulty in spooling the film in such a small space (it got a bit crushed/scratched trying to move things around) and that the film was scraping against metal every time I wound it inside the camera. Scanning was a different struggle entirely, too – I’m still kind of bothered that I had to cut the film to a normal size to get my scanner to accept it, so many of the scans you’re about to see can’t be reproduced again. However, I’m still very happy with and excited about these.
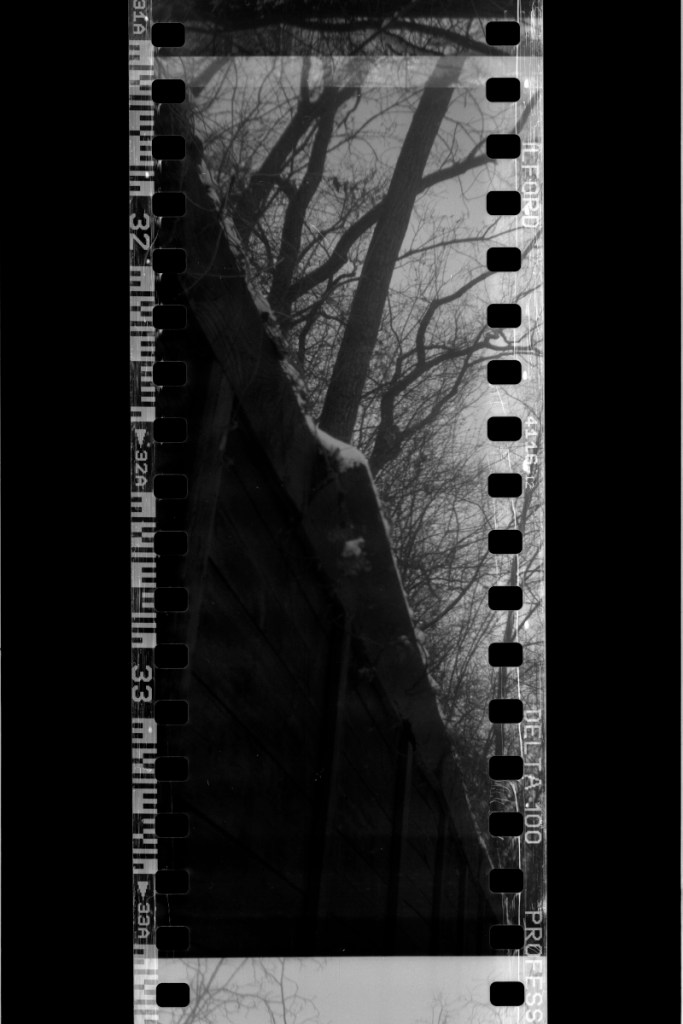
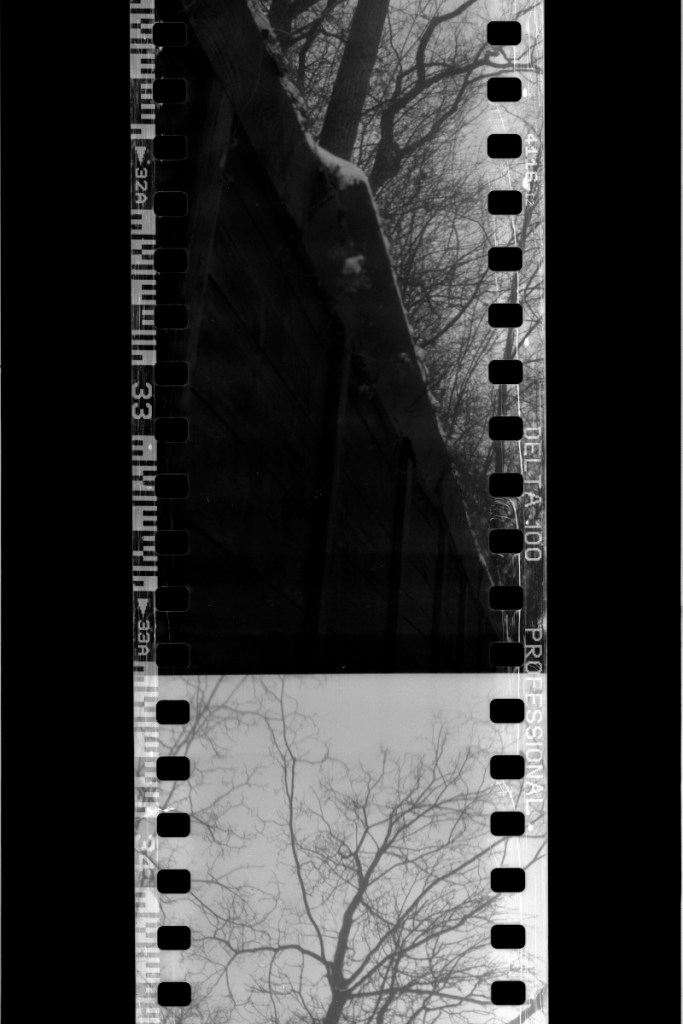
I’m putting the ‘longer’ versions first so you can get an idea of what the length of film looked like before I cropped it to more normal sizes. There are parts of the film that just weave together in such a lovely way, it was truly very difficult to figure out what the ‘right’ crop would be for each of these.
Camera: Brownie Junior Six-20
Film: Ilford Delta 100 Professional